


WebSockets allows the setup of a very fast two-way secure network connection between different parties. This is different from the HTTP protocol and used only when we need real-time updates. For example, all of the chat apps you use are built using WebSockets. Stock market updates are shown using the same protocol.
We can simply connect to a WebSocket channel using an URL and can listen to all the updates coming from that channel. For example, if we connect to the stock channel of some particular entity, we’ll receive timely updates about the price of that stock. We can disable the connection whenever we want.
More than one client can connect to a WebSocket channel, and it’s the duty of WebSockets to send updates to all the clients that are connected to it.
For testing the WebSocket connection, we use two different terms: PING and PONG. A client will send a PING to the WebSocket URL, and in response, the channel will send a PONG back to the client. This cycle establishes there’s an ongoing connection between a client and the channel.
WebSockets in iOS
Up till iOS 12, there was no first-hand support for WebSockets, although we can use third-party libraries for using WebSockets in our project. One of the most common open-source libraries is Starscream.
You can look at the documentation, if you want, to support iOS 12 or previous iOS versions in your app. But in this article, we’re going to learn about the new addition to the iOS library for handling WebSockets directly.
We’ll start by creating a new empty Playground (all these things would also work in an Xcode project).
URLSessionWebSocketDelegate
This protocol contains two different methods that can be used to check whether we’ve established a connection to a channel or disconnected a channel.
class WebSocket: NSObject, URLSessionWebSocketDelegate {

    func urlSession(_ session: URLSession, webSocketTask: URLSessionWebSocketTask, didOpenWithProtocol protocol: String?) {
        print("Web Socket did connect")
    }

    func urlSession(_ session: URLSession, webSocketTask: URLSessionWebSocketTask, didCloseWith closeCode: URLSessionWebSocketTask.CloseCode, reason: Data?) {
        print("Web Socket did disconnect")
    }
}
We’ve created a class, WebSocket, which will confirm to the URLSessionWebSocketDelegate protocol.
This protocol has two methods that we’ll be using: The first one is called when the client establishes a connection with the channel, and second one is called when the client disconnects with the channel. We’ll simply print out Web Socket did connect and Web Socket did disconnect whenever our client connects or disconnects with the web socket channel.
Establishing a connection
let webSocketDelegate = WebSocket()
let session = URLSession(configuration: .default, delegate: webSocketDelegate, delegateQueue: OperationQueue())
let url = URL(string: "wss://echo.websocket.org")!
let webSocketTask = session.webSocketTask(with: url)
webSocketTask.resume()
We’ve created a session using URLSession with the default configuration, our WebSocket class as the delegate, and the OperationQueue. We’ve used a sample and free WebSocket channel URL, wss://echo.websocket.org. This can be used by anyone to send and receive messages using WebSockets.
iOS 13 has a new task inside URLSession called webSocketTask— it’s primarily used to create a task that’ll connect to a WebSocket channel using the given URL. In the last line, we simply resume() the WebSocket task so we can have a connection with the channel.
After calling webSocketTask.resume(), we’ll establish a connection with the channel, and our delegate method will be called. Remember we used two delegate methods, and this time we’ve established a channel so the first method will be called. It’ll print out Web Socket did connect in the debug console.
PING/PONG
After establishing a connection, it’s a very good practice to timely check whether our connection is still established or not. This can be done by sending a PING to the channel, and, in response, the channel will send back a PONG to us.
func ping() {
  webSocketTask.sendPing { error in
    if let error = error {
      print("Error when sending PING \(error)")
    } else {
        print("Web Socket connection is alive")
        DispatchQueue.global().asyncAfter(deadline: .now() + 5) {
            ping()
        }
    }
  }
}
We’ve created a new method, ping, which will be used to test our connection with the channel every five seconds.
webSocketTask provides us with sendPing, which automatically sends a ping to the channel URL and gives us the response with an error if we don’t receive a PONG back from the channel. We’re simply printing out the error in case our connection is no longer established. In production, we can use this to create the connection once again if it’s lost for some reason.
If we successfully receive a PONG from the channel, we use the global queue to call the ping method once again after five seconds. This will make sure we’ll check for the connection every five seconds, and if the connection is disconnected, we’ll print the error and stop.
A good practice is to start pinging the channel as soon as the connection is established, so we’ll call the ping method from one of the delegate methods that’s called after a connection is established.
class WebSocket: NSObject, URLSessionWebSocketDelegate {

    func urlSession(_ session: URLSession, webSocketTask: URLSessionWebSocketTask, didOpenWithProtocol protocol: String?) {
        print("Web Socket did connect")
        ping()
    }

    func urlSession(_ session: URLSession, webSocketTask: URLSessionWebSocketTask, didCloseWith closeCode: URLSessionWebSocketTask.CloseCode, reason: Data?) {
        print("Web Socket did disconnect")
    }
}
Closing a connection
For some reason, if we want to close the connection when our app goes into the background or a user kills the app, it’s a good practice to close the connection from the client and notify the channel about the reason why this connection was closed.
func close() {
  let reason = "Closing connection".data(using: .utf8)
  webSocketTask.cancel(with: .goingAway, reason: reason)
}
We’ll first create a reason string and convert it into Data, and then we’ll simply call cancel, providing the reason we just created. This will simply close our connection with the channel.
Sending/receiving messages
Here comes the most important part of sending and receiving messages using WebSockets. Since we’re using a sample WebSocket channel, we ourselves have to send and receive the same message. But in a real-world scenario, a channel can send a message to the client or vice versa.
func send() {
    DispatchQueue.global().asyncAfter(deadline: .now() + 1) {
        send()
        webSocketTask.send(.string("New Message")) { error in
          if let error = error {
            print("Error when sending a message \(error)")
          }
        }
    }
}


func receive() {
  webSocketTask.receive { result in
    switch result {
    case .success(let message):
      switch message {
      case .data(let data):
        print("Data received \(data)")
      case .string(let text):
        print("Text received \(text)")
      }
    case .failure(let error):
      print("Error when receiving \(error)")
    }

    receive()
  }
}
We’ve create two different methods: send and receive. Let’s understand them one by one.
webSocketTask.send can be used to send a String message or a Data message to the channel. In this demo, we’re only sending a String message. We’ve used the global queue to call the send() method again and again after one second. This will make sure we’re sending and receiving the messages after each second. If there’s an error sending the message, the callback will be called with an error, and we can diagnose the error. But we’re not going to do that in this demo.
webSocketTask.receive is used to receive messages from the channel we’re connected with. In the success case, it’ll either send us a String message or the Data message. In the failure case, it’ll simply send us an error message.
There’s one caveat in that we’ll have to call the receive method again and again in order to continue receiving messages from the channel. So every time we receive a message, we’re again going to call the receive method, which will make sure we receive all the future messages as well.
One last thing: We’ll call send() and receive() from our delegate method so we can start receiving messages using the WebSocket channel.
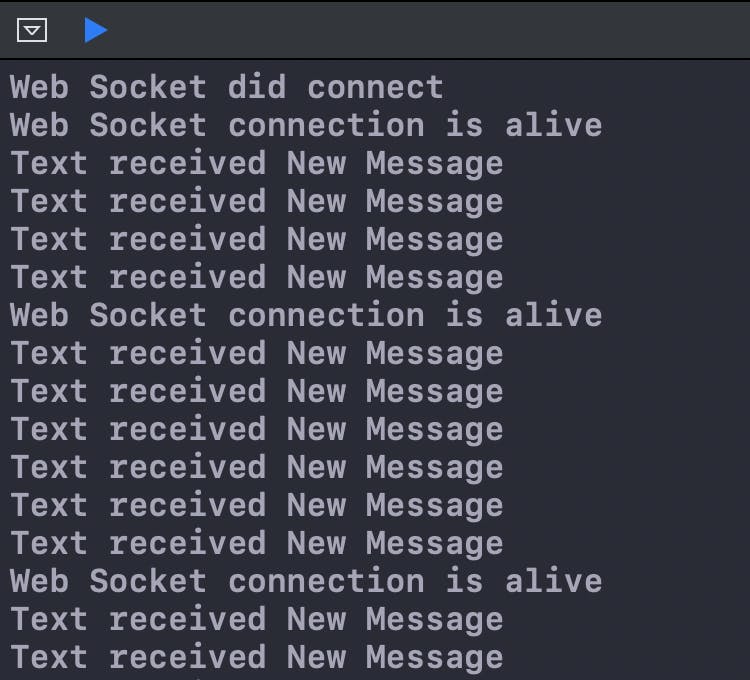
Now if you run the Playground, you’ll see these messages printing in the debug console.
class WebSocket: NSObject, URLSessionWebSocketDelegate {

    func urlSession(_ session: URLSession, webSocketTask: URLSessionWebSocketTask, didOpenWithProtocol protocol: String?) {
        print("Web Socket did connect")
        ping()
        send()
        receive()
    }

    func urlSession(_ session: URLSession, webSocketTask: URLSessionWebSocketTask, didCloseWith closeCode: URLSessionWebSocketTask.CloseCode, reason: Data?) {
        print("Web Socket did disconnect")
    }
}
Wrapping Up
Thanks for reading this. Hope you gained some knowledge with this article.
You can download the full source code from GitHub.